# Preface
This tutorial is based on the "apifm-wxapi" module and teaches you how to quickly implement small program development, so you may need to understand the following knowledge points first:
["Creating HelloWorld Project"](https://www.yuque.com/apifm/doc/hezlrm)
["Use "apifm-wxapi" to quickly develop small programs"](https://www.yuque.com/apifm/doc/mdldsd)
["Register for free to open the backend and obtain an exclusive domain name"](https://www.yuque.com/apifm/doc/qr6l4m)
In this case, the user needs to log in before the operation can be performed, which means token authorization is required. Please understand first:
["WeChat Mini Program login to obtain openid and third-party tokens"](https://www.yuque.com/apifm/doc/kaygbw)
To facilitate testing, please log in to the backend first, add available balance to your test users in "User Asset Management", and then you can fully experience the deposit payment process:
["Add a fund module to the existing mini program (view assets, view capital flow)"](https://www.yuque.com/apifm/doc/lhwvwa)
# Enable "Deposit Management" module
Log in to the "First Step" registration background, left menu --> Factory settings --> Module management
Find the "Deposit Management" module, click "Enable Module", then F5 to refresh the background interface, you will see the new menu: "Deposit Management";
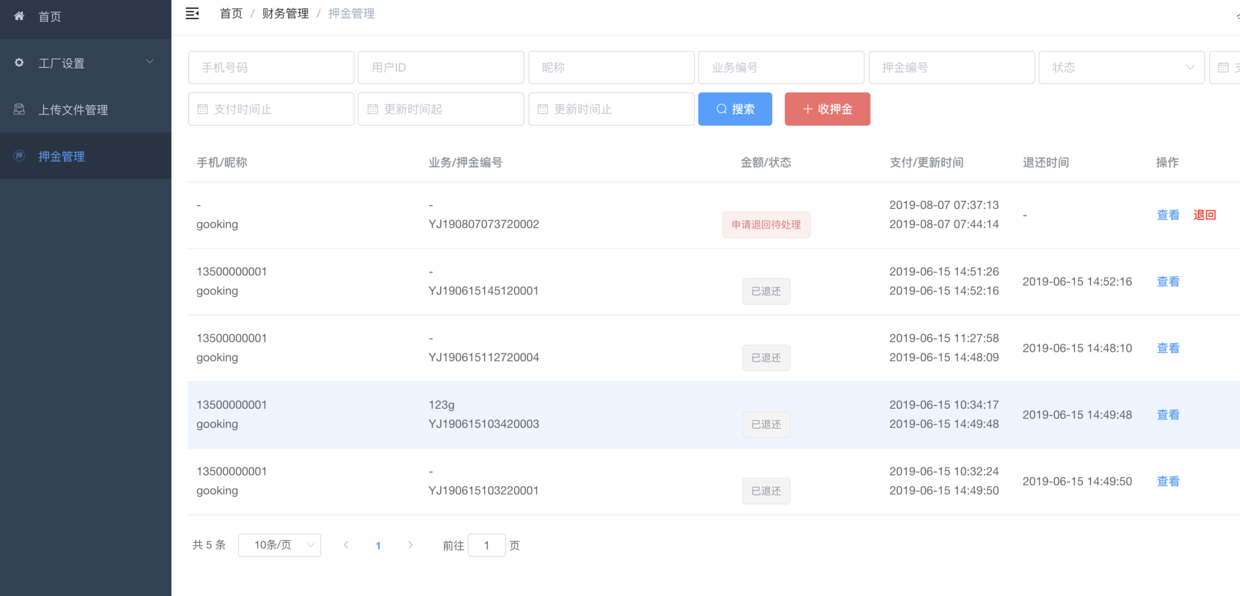
# Function introduction
1. Usage scenarios such as shared bicycles, empty barrel deposits for bottled water, etc. can be quickly implemented using this function;
2. Users pay the required deposit independently and can apply for refund at any time later;
3. The deposit paid is reflected in the form of frozen assets, and the user’s total assets remain unchanged;
# Mini program interface:
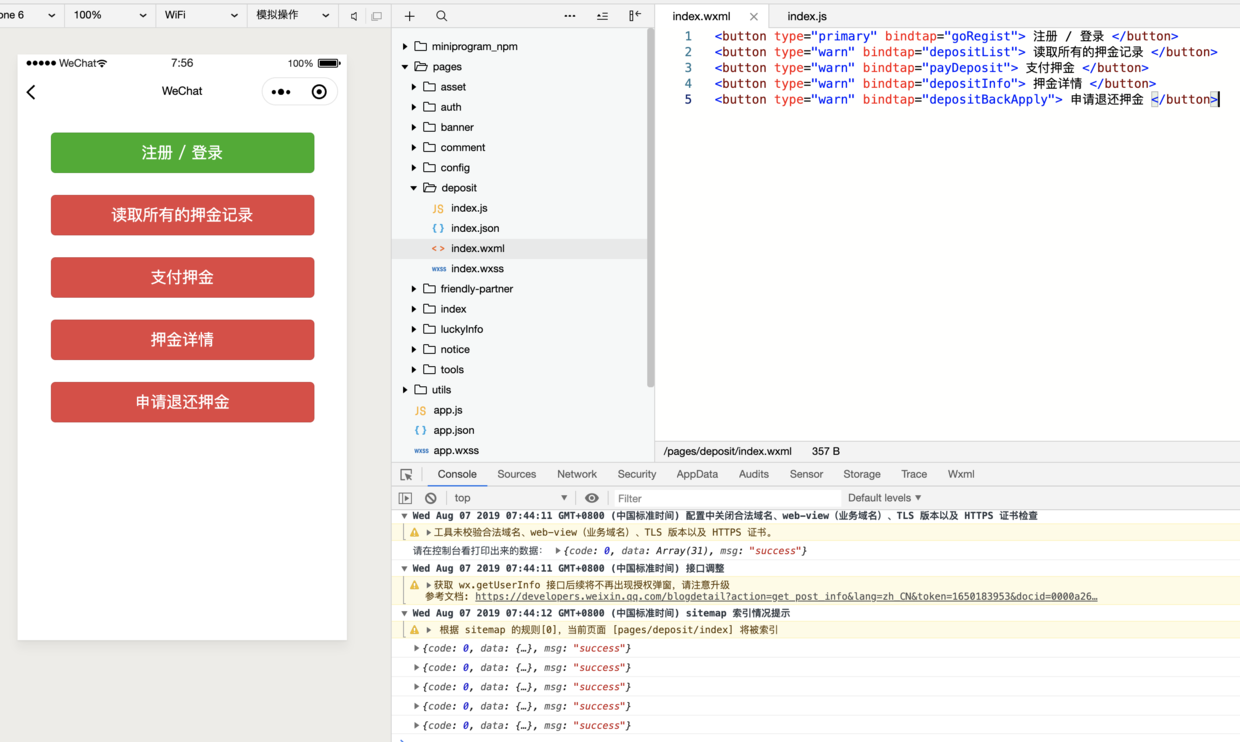
```plain
```
# Mini program code:
```plain
const WXAPI = require('apifm-wxapi')
WXAPI.init('gooking')
Page({
data: {
},
onLoad: function (options) {
},
onShow: function () {
},
goRegist() {
wx.navigateTo({
url: '/pages/auth/index'
})
},
depositList() {
const loginToken = wx.getStorageSync('loginToken')
if (!loginToken) {
wx.showToast({
title: 'Please log in first',
icon: 'none'
})
return
}
WXAPI.depositList({
token: loginToken.token
}).then(res => {
console.log(res)
if (res.code == 0) {
wx.showToast({
title: 'Read successfully',
icon: 'success'
})
} else {
wx.showToast({
title: res.msg,
icon: 'none'
})
}
})
},
payDeposit() {
const loginToken = wx.getStorageSync('loginToken')
if (!loginToken) {
wx.showToast({
title: 'Please log in first',
icon: 'none'
})
return
}
WXAPI.payDeposit({
token: loginToken.token,
amount: 98,
remark: 'test'
}).then(res => {
console.log(res)
if (res.code == 0) {
wx.showToast({
title: 'Payment successful',
icon: 'success'
})
} else {
wx.showToast({
title: res.msg,
icon: 'none'
})
}
})
},
depositInfo() {
const depositLogId = 23 //Read the deposit ID in the deposit record
const loginToken = wx.getStorageSync('loginToken')
if (!loginToken) {
wx.showToast({
title: 'Please log in first',
icon: 'none'
})
return
}
WXAPI.depositInfo(loginToken.token, depositLogId).then(res => {
console.log(res)
if (res.code == 0) {
wx.showToast({
title: 'Read successfully',
icon: 'success'
})
} else {
wx.showToast({
title: res.msg,
icon: 'none'
})
}
})
},
depositBackApply() {
const depositLogId = 23 //Read the deposit ID in the deposit record
const loginToken = wx.getStorageSync('loginToken')
if (!loginToken) {
wx.showToast({
title: 'Please log in first',
icon: 'none'
})
return
}
WXAPI.depositBackApply(loginToken.token, depositLogId).then(res => {
console.log(res)
if (res.code == 0) {
wx.showToast({
title: 'Application successful, waiting for processing',
icon: 'success'
})
} else {
wx.showToast({
title: res.msg,
icon: 'none'
})
}
})
},
})
```
> WXAPI.init('gooking') This code links your mini program to your backend, where gooking is your exclusive domain name (please check the chapter about exclusive domain names in the preface);
>
_Done! _
Any changes to the deposit (changes from design to funds) will be reflected in the fund details. You can review the following chapters to view the fund flow records:
["Add a fund module to the existing mini program (view assets, view capital flow"](https://www.yuque.com/apifm/doc/lhwvwa)
_For paging of the deposit record list, more filtering conditions, more parameters submitted when paying the deposit, and the use of extended attributes, you can view the following interface documents: _
["api interface document"](#)
_No back-end programming is required, as long as you have a good idea, you can quickly implement it! _
Looking forward to your progress!
Thanks!