# Preface
This tutorial is based on the "apifm-wxapi" module and teaches you how to quickly implement small program development, so you may need to understand the following knowledge points first:
["Creating HelloWorld Project"](https://www.yuque.com/apifm/doc/hezlrm)
["Use "apifm-wxapi" to quickly develop small programs"](https://www.yuque.com/apifm/doc/mdldsd)
["Register for free to open the backend and obtain an exclusive domain name"](https://www.yuque.com/apifm/doc/qr6l4m)
# Function description
In many security situations, it is necessary to use the SMS verification code function to ensure that the operator is himself;
Generally, apps will use the method of “mobile phone number + SMS verification code” to implement user registration/login;
When you forget your password, you usually use “mobile phone number + SMS verification code” to reset your login password;
_So, in this example, we will take you to write a WeChat Mini Program that can send a verification code, and after receiving the verification code, enter the correct verification code to verify whether it is correct_
# Preparation
1. Apply for SMS verification code sending channel
_This Case is to actually send a mobile phone SMS verification code, so you need to open the SMS channel first. There are currently many platforms where you can apply for (free trial) SMS channel; "apifm-wxapi" supports the following SMS operators. You can generally get the number of free trial SMS messages after registering an account: Alibaba Cloud, Tencent Cloud, Shiyuan Technology, Saiyou Cloud Communication, Chuangrui, Yunzhixun, Bami Technology, Shanghai Zhutong_
**If you have special needs, please leave a message and we will add support for new SMS operators for you**
2. Review the “Graphical Captcha” tutorial
For security reasons and to prevent text message robots from bombarding you with text messages, as is done by many existing apps, you need to manually fill in a graphic verification code before obtaining the SMS verification code; only when the graphic verification code you fill in is correct, will the verification code text message be sent to the mobile phone number you filled in?
["Example of Mini Program Graphical Verification Code Input Verification"](https://www.yuque.com/apifm/doc/bweqg7)
#Backend configuration
## Turn on the "SMS Verification Code" module
Log in to the "First Step" registration background, left menu --> Factory settings --> Module management
Find the "SMS Verification Code" module, click "Enable Module", then F5 to refresh the background interface, you will see the new menu: "SMS Settings" -> "Verification Code Settings";
## Configure SMS channel
Click the "Verification Code Settings" menu above, and click to enter the configuration according to the operator of the SMS channel you applied for;
After the correct configuration, you can continue to the next chapter and experience sending text messages;
## View SMS sending records
The left menu "SMS Settings" -> "SMS Records" records in detail the SMS sending records for each SMS verification code, in case of subsequent inquiries when necessary;
# Mini program implementation
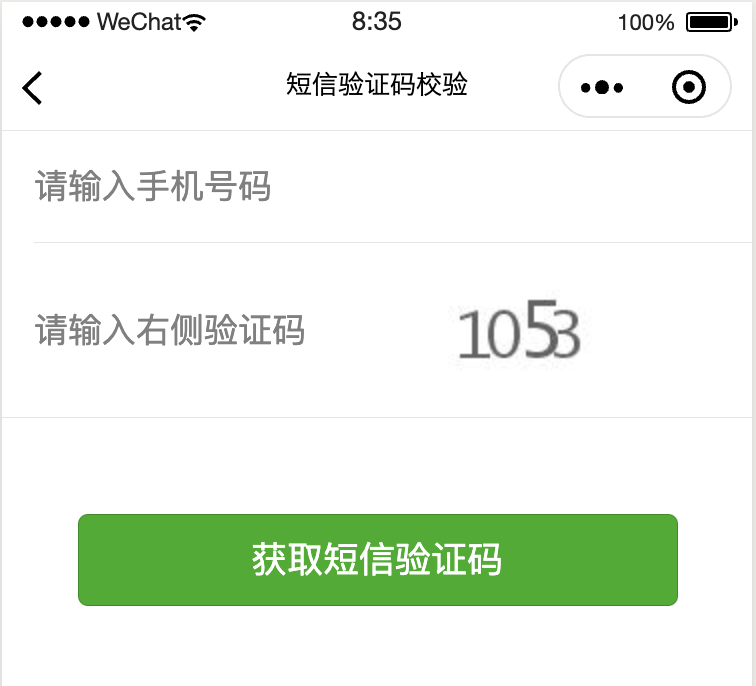
## Effect demonstration
## wxml code
```plain```
## js code
```plain
const WXAPI = require('apifm-wxapi')
WXAPI.init('gooking')
Page({
data: {
key: Math.random(),
picurl: undefined,
mobile: undefined,
piccode: undefined,
code: undefined,
smsCodeSend: false, // Whether the SMS has been sent
},
onLoad: function (options) {
},
onShow: function () {
this.changePic()
},
changePic(){
const _key = Math.random()
this.setData({
code: null,
key: _key,
picurl: WXAPI.graphValidateCodeUrl(_key)
})
},
piccodeChange(e){
this.setData({
piccode:e.detail.value
})
},
codeChange(e){
this.setData({
code: e.detail.value
})
},
mobileChange(e){
this.setData({
mobile:e.detail.value
})
},
get() {
if (!this.data.mobile){
wx.showToast({
title: 'Mobile phone number cannot be empty',
icon: 'none'
})
return
}
if (!this.data.piccode){
wx.showToast({
title: 'Graphic verification code cannot be empty',
icon: 'none'
})
return
}
WXAPI.smsValidateCode(this.data.mobile, this.data.key, this.data.piccode).then(res => {
console.log(res)
if (res.code == 0) {
wx.showToast({
title: 'SMS Sent',
icon: 'success'
})
this.setData({
smsCodeSend: true
})
} else {
wx.showToast({
title: res.msg,
icon: 'none'
})
this.changePic()
}
})
},
check() {
if (!this.data.mobile){
wx.showToast({
title: 'Mobile phone number cannot be empty',
icon: 'none'
})
return
}
if (!this.data.code){
wx.showToast({
title: 'Verification code cannot be empty',
icon: 'none'
})
return
}
WXAPI.smsValidateCodeCheck(this.data.mobile, this.data.code).then(res => {
console.log(res)
if (res.code == 0) {
wx.showToast({
title: 'Enter correctly',
icon: 'success'
})
} else {
wx.showToast({
title: res.msg,
icon: 'none'
})
}
})
}
})
```
> WXAPI.init('gooking') This code links your mini program to your backend, where gooking is your exclusive domain name (please check the chapter about exclusive domain names in the preface);
>
# Summary
This case mainly uses the following two methods of apifm-wxapi:
```plain
WXAPI.smsValidateCode(mobile, key, picCode)
WXAPI.smsValidateCodeCheck(mobile, code)
```
_If the graphic verification code verification is not enabled in the background, the two parameters 2 and 3 of the first method do not need to be passed. However, in this case, they should be used with caution to prevent SMS bombing_
_More usage methods about apifm-wxapi: _
["apifm-wxapi Instructions for Use"](https://github.com/gooking/apifm-wxapi/blob/master/instructions.md)
_Download the Demo code of this case: _
["apifm-wxapi using Demo program"](https://github.com/gooking/apifm-wxapi-demo)
Looking forward to your progress!
grateful!