# Idea:
Using the workflow, first call the background API interface to deduct user points. After the deduction is successful, call the upload file API interface to complete the file upload.
# Steps:
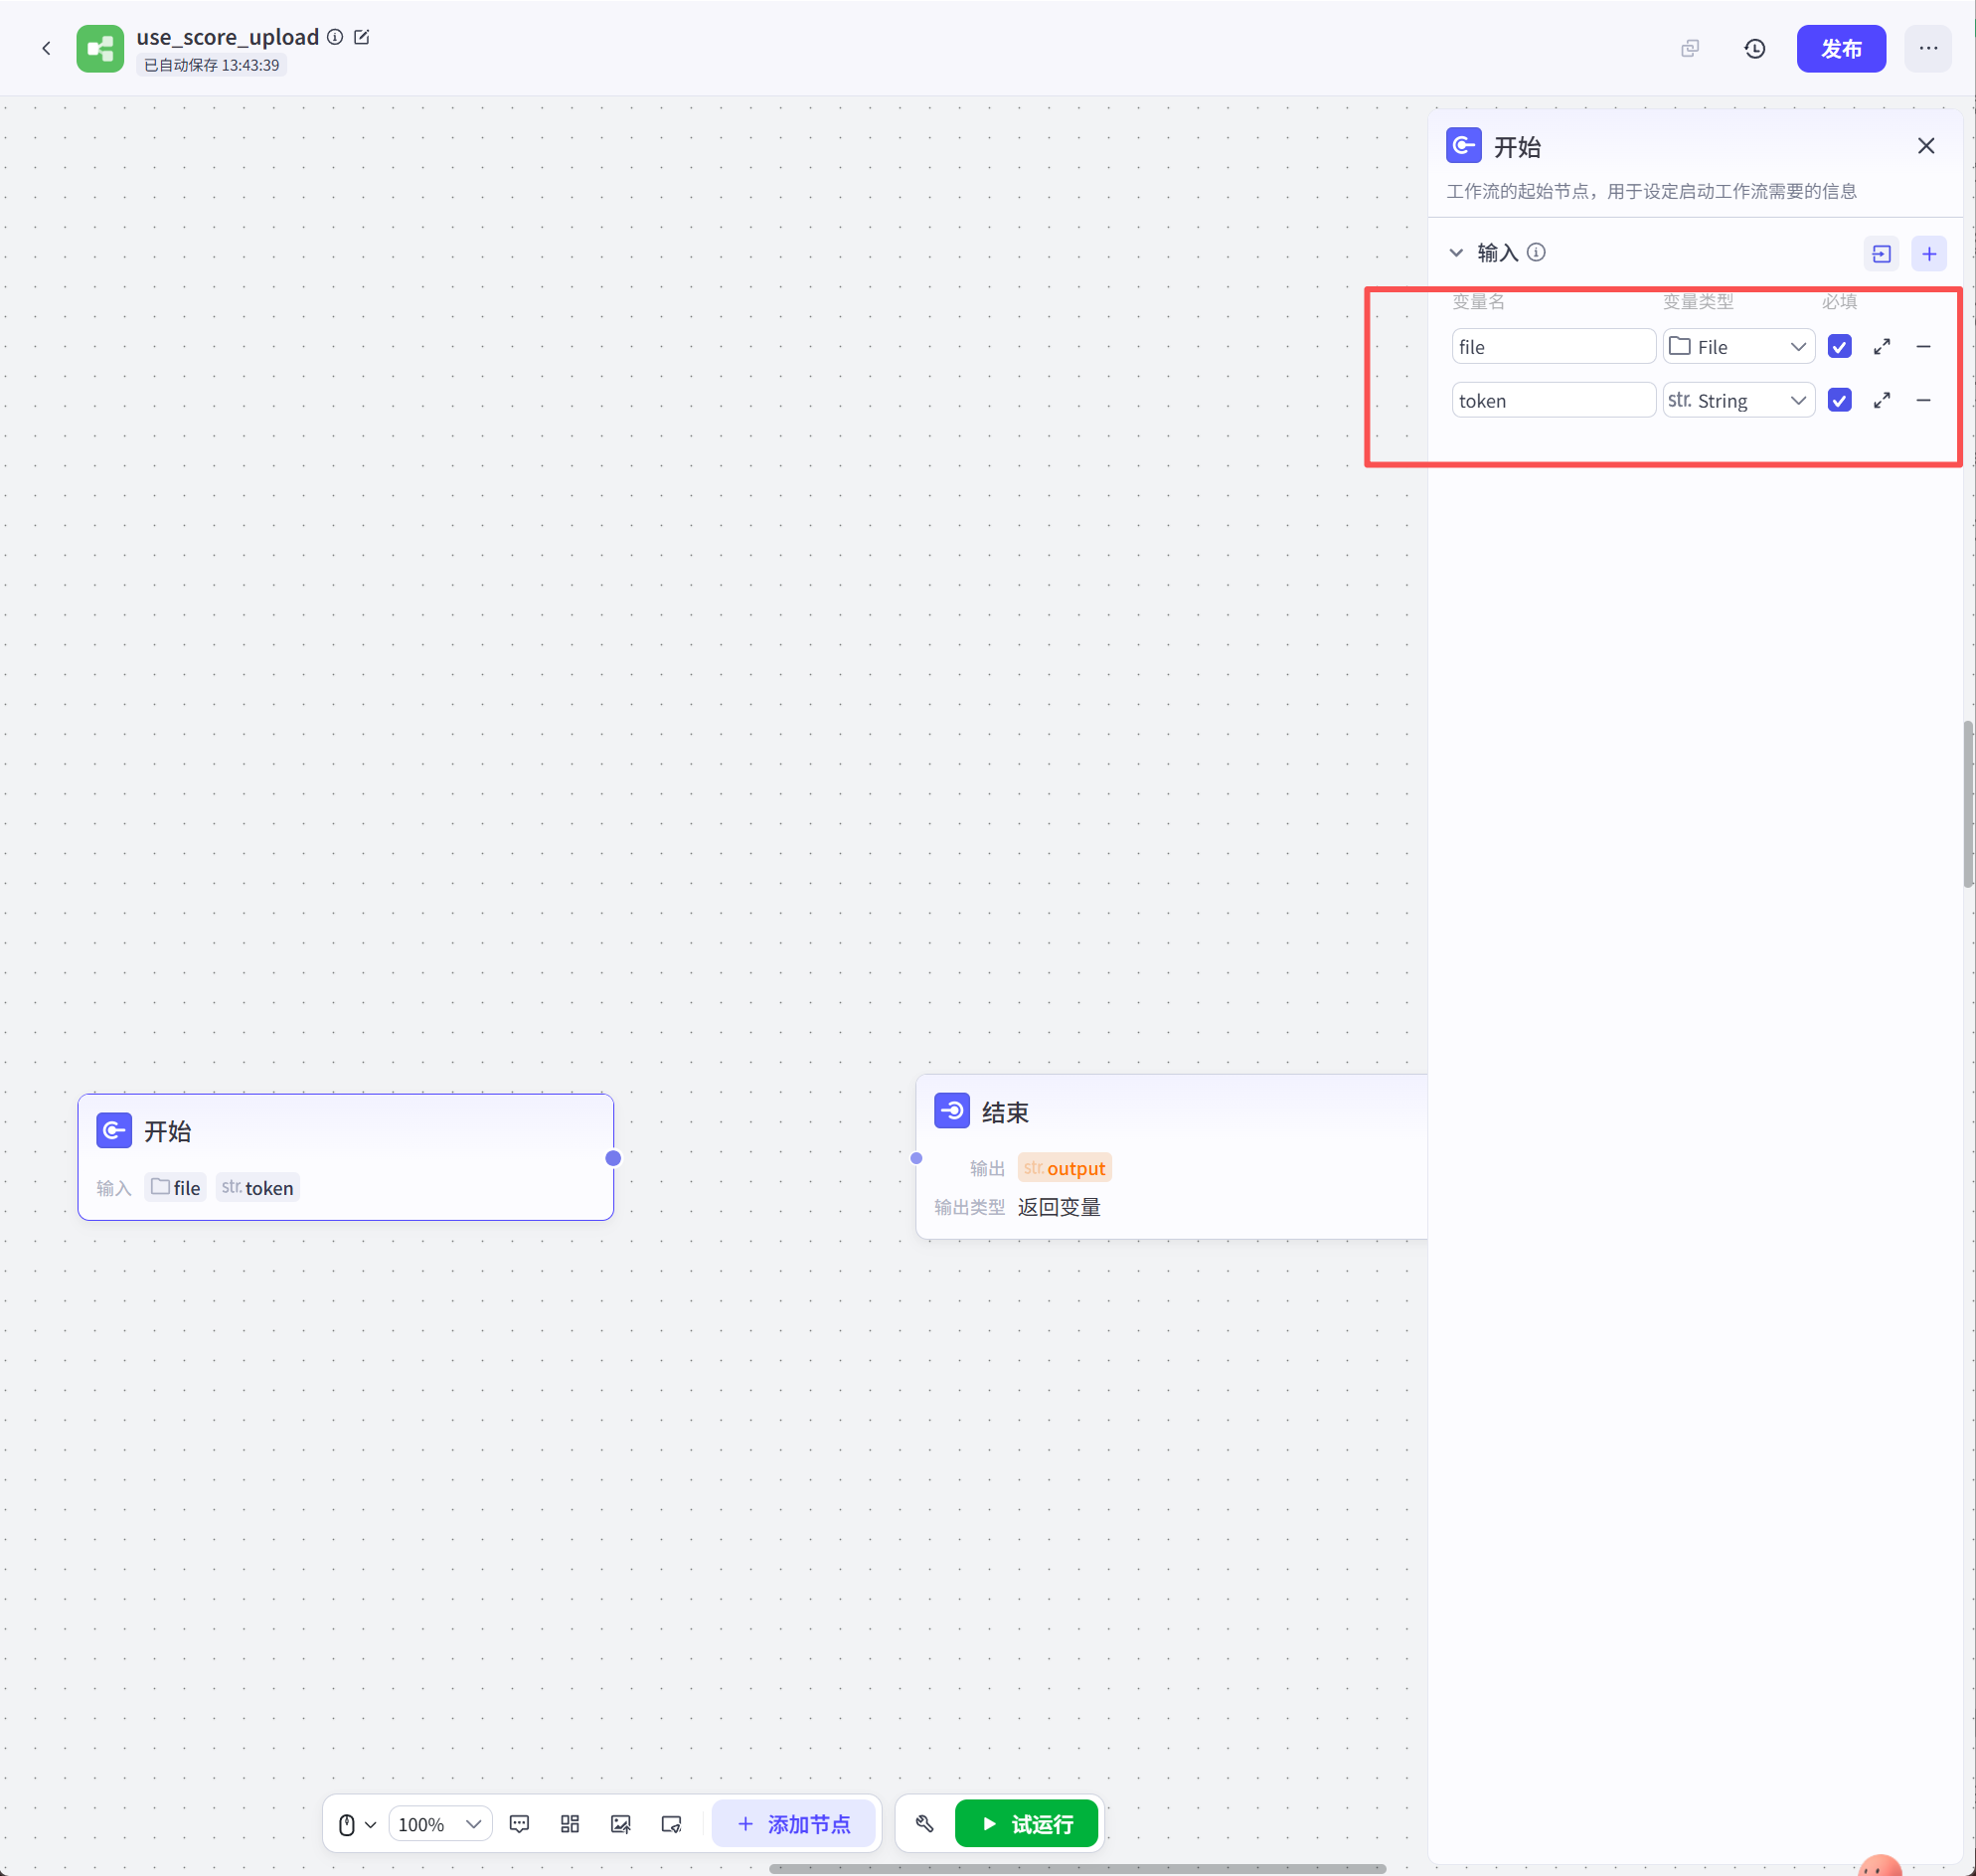
Enter 2 parameter settings:
1. The current user logs in with a token, so that the user ID can be obtained through the token, and points can be deducted from the user ID later.
2. Upload file parameters
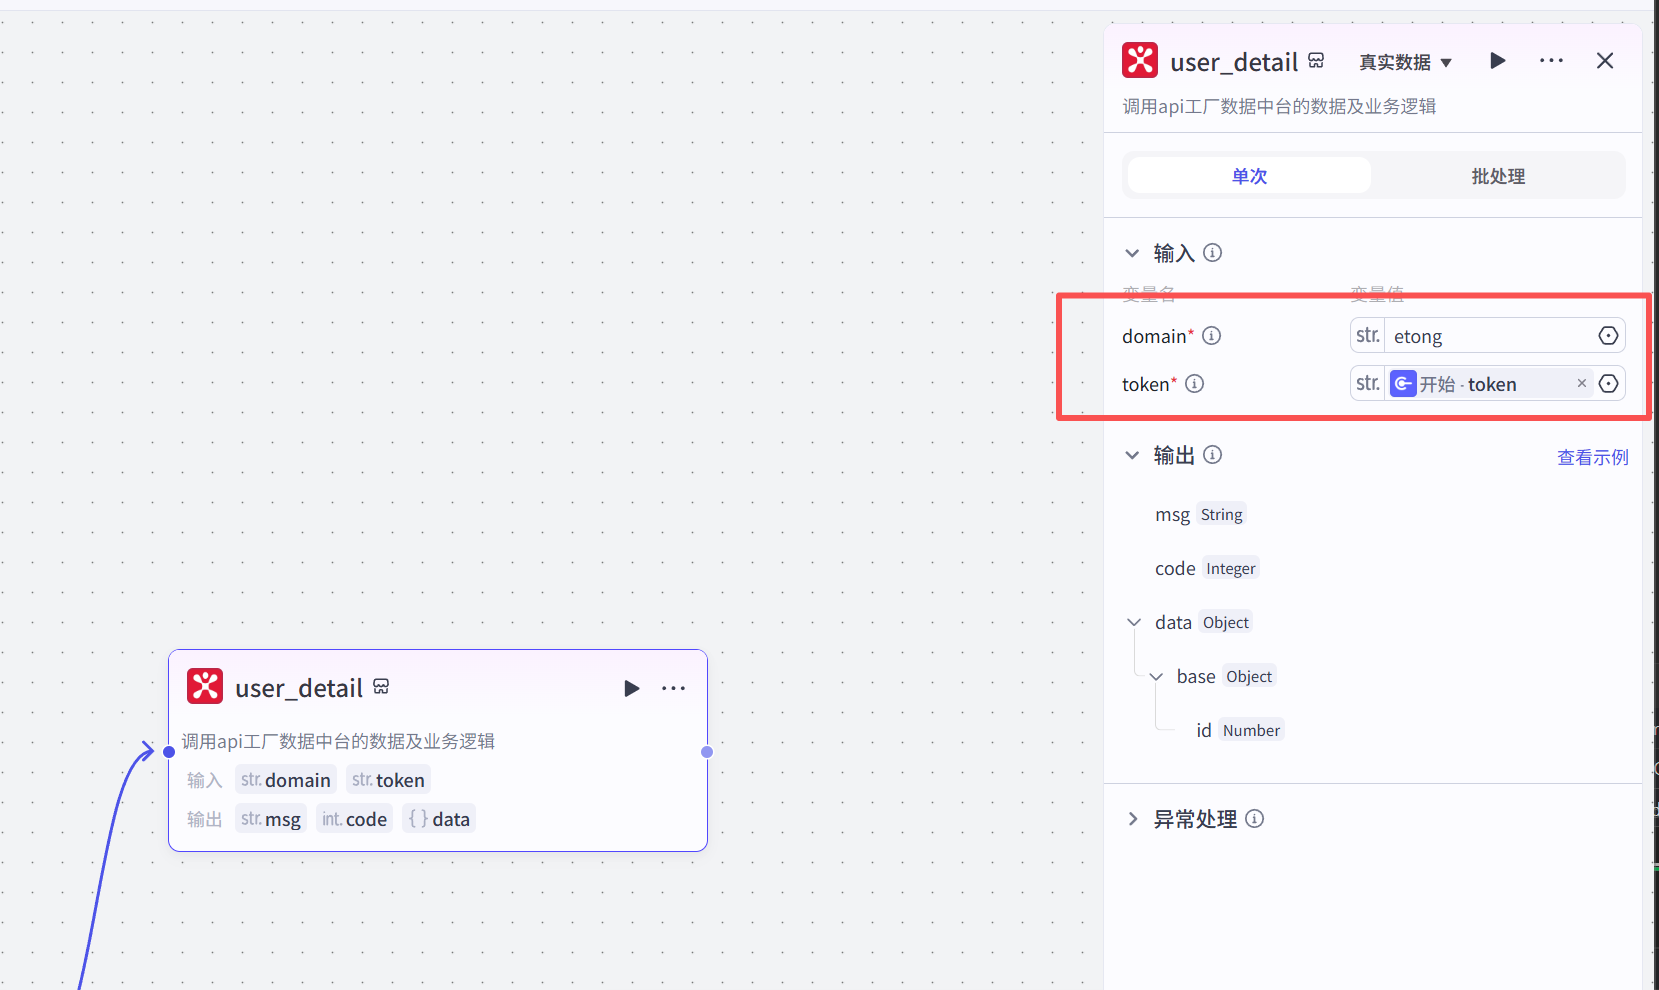
Next node, select the plug-in and search for the `apifm base` plug-in to obtain the user ID. This plug-in requires 2 parameters:
1. Domain fill in your exclusive domain name, this can be filled in permanently
2. token, here directly reference this parameter from the start node of the previous step.
In the next node, select the plug-in and search for the `apifm admin` plug-in, which is used to deduct user points. This plug-in requires the following parameters:
1. Authorization, which is the authorization information for calling the backend api interface, can be viewed directly in your "apifm" backend, click "Factory settings" --> "Merchant Information" --> "Basic Authentication" on the left menu, and copy it directly;
2. remark, fill in the notes for deducting points this time
3. score, the number of points that need to be deducted. When deducting points, be sure to fill in a negative number. Negative numbers are for deduction. Positive numbers are for adding points to the user.
4. uid, user number, can be directly referenced from the node in the previous step.

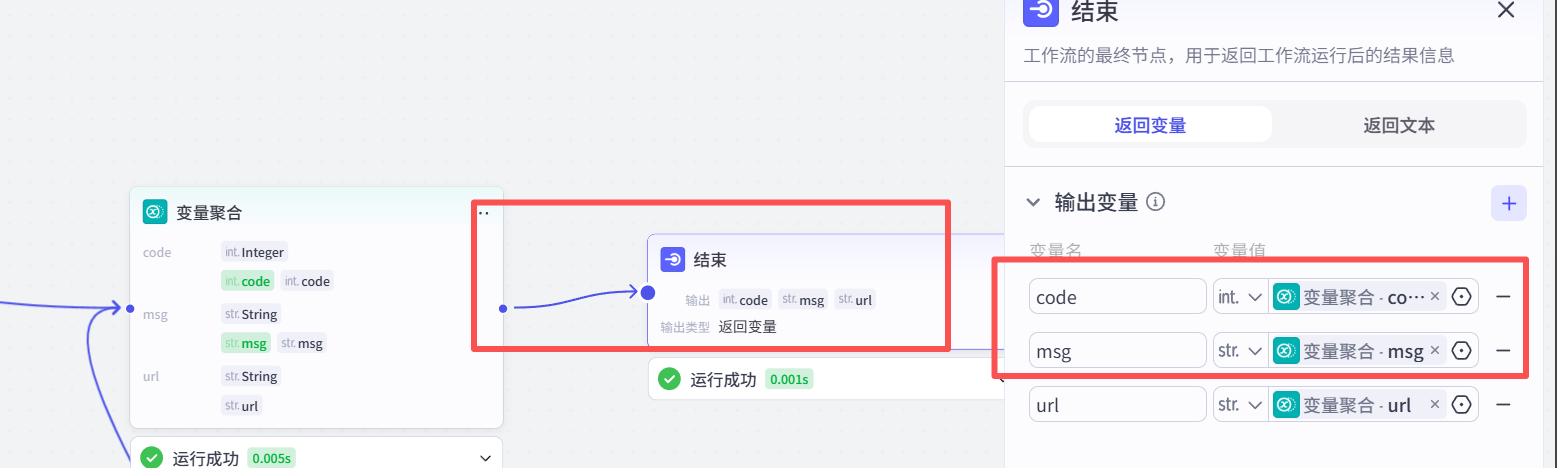
Different business processes are performed below depending on whether the points deduction is successful. Because there are two situations, success and failure, there are two situations of output results. Therefore, at this time, you need to use the "Variable Aggregation" node to aggregate the data of the two situations and return:

Here is the plug-in that deducts points. The code returned is not 0, which means the deduction failed and the error message is returned directly.
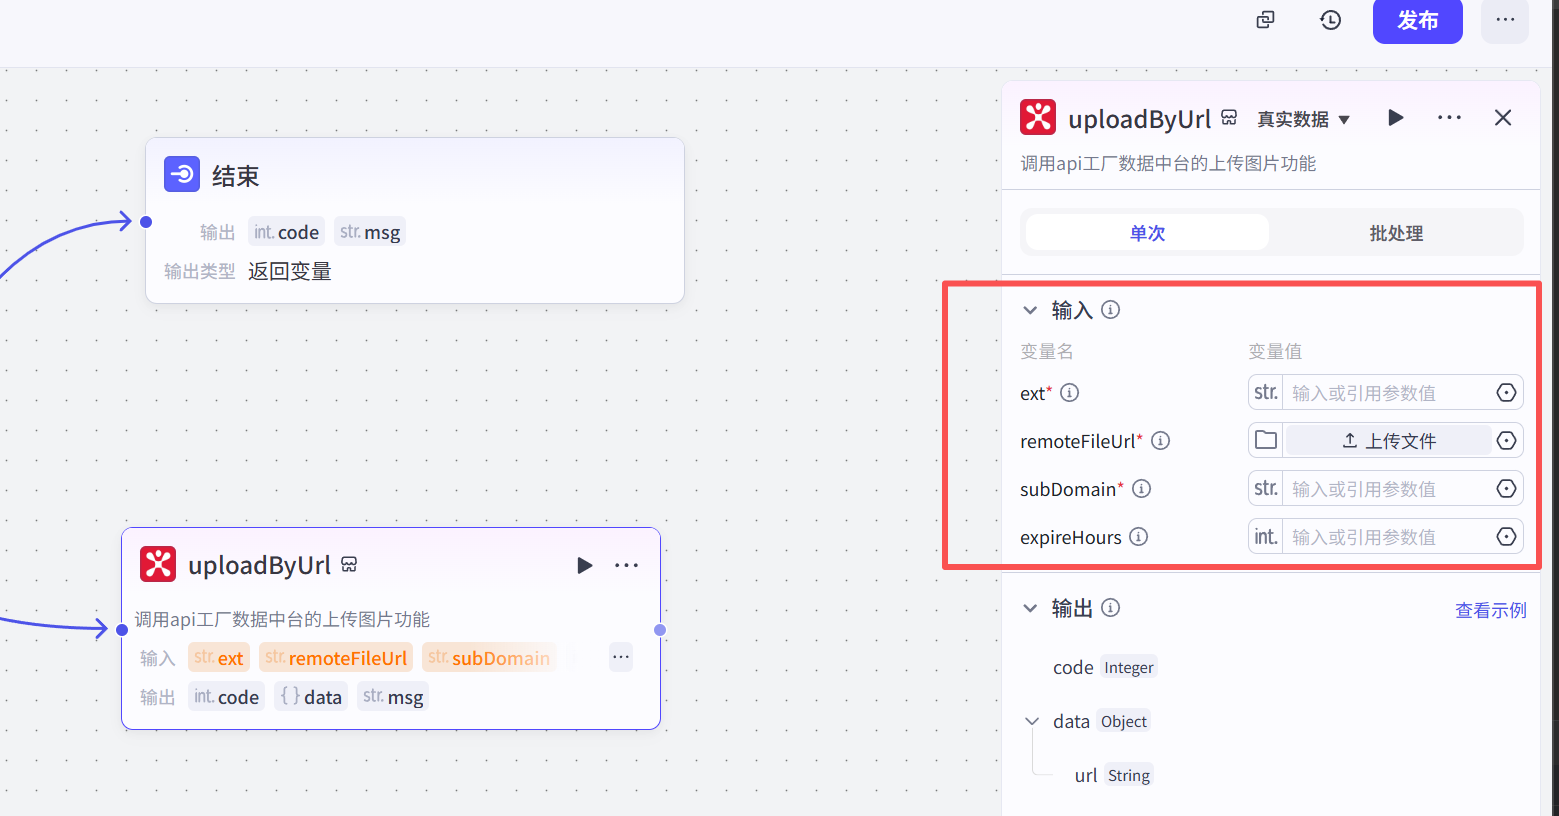
The other branch is that the points are successfully deducted. Next, proceed to the process of the other branch, call the upload file interface to upload the file, select the plug-in, and search for `apifm oss`:
The plugin requires the following parameters:
1. The suffix of the ext file, fill in .png or .jpg according to your own needs.
2. remoteFileUrl, transfer files, here you can directly reference the file file in the starting node.
3. SubDomain is filled in the same way as the exclusive domain name in the above steps.
4. expireHours This parameter means that the file will be automatically deleted after a few hours. If you do not want to delete it automatically, just leave it blank here.
After the upload is completed, add an output node and output the results:
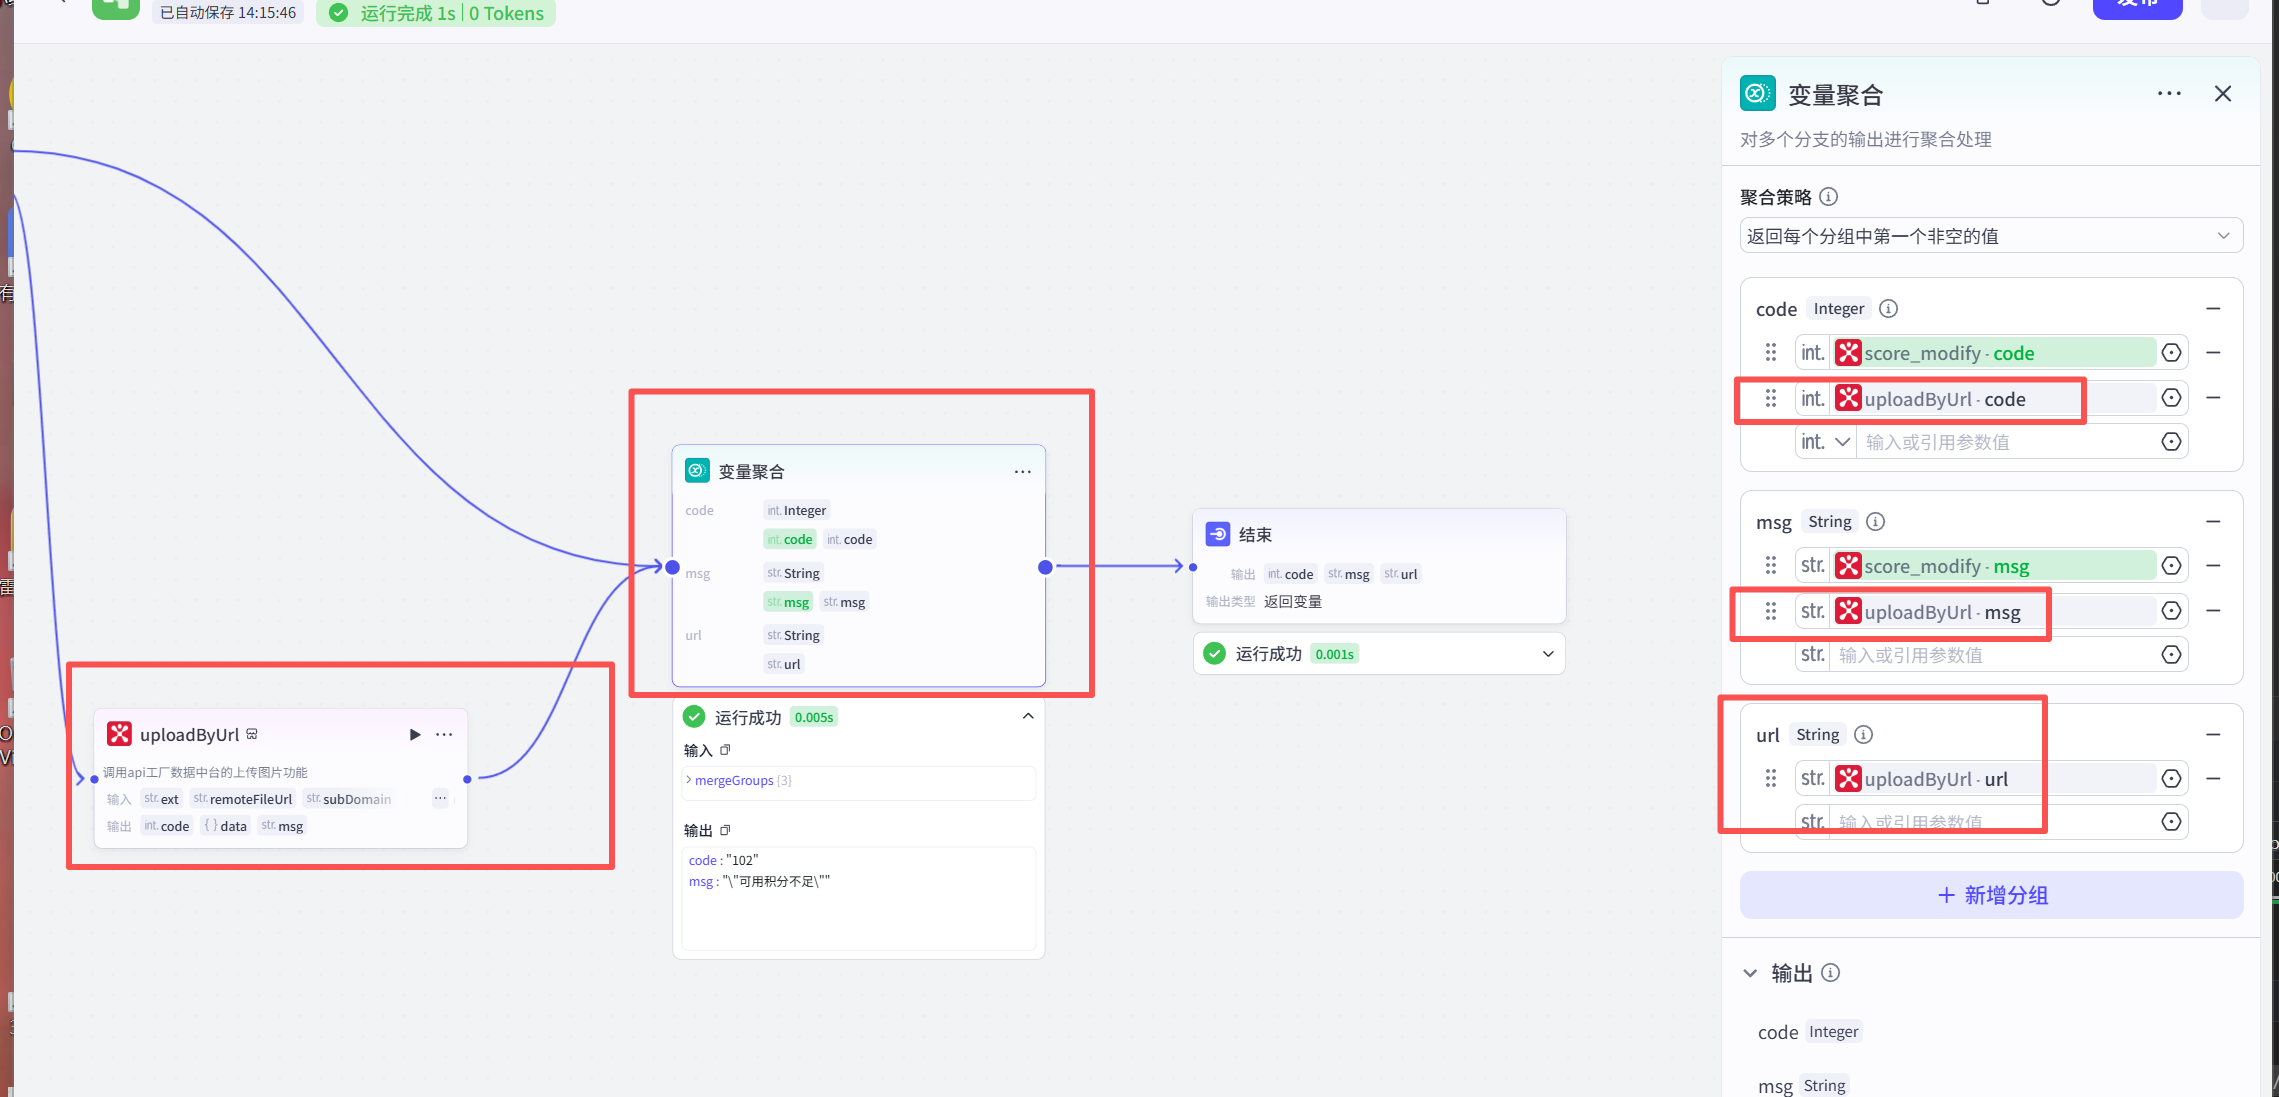
code, msg, url, directly refer to the return value of the variable aggregation node and return the result
# Release:
In the upper right corner, click Publish. Only after publishing, the workflow can be called through Coze's API interface.
If calling a workflow, check out the menu on the left for the Calling Workflow Tutorial
According to the above workflow, if the execution is successful, code returns 0, msg returns success, and url will return the uploaded file link address; if execution fails, code returns a non-0 number, and msg returns specific error information.