# Preface
This tutorial is based on the "apifm-wxapi" module and teaches you how to quickly implement small program development, so you may need to understand the following knowledge points first:
["Creating HelloWorld Project"](https://www.yuque.com/apifm/doc/hezlrm)
["Use "apifm-wxapi" to quickly develop small programs"](https://www.yuque.com/apifm/doc/mdldsd)
["Register for free to open the backend and obtain an exclusive domain name"](https://www.yuque.com/apifm/doc/qr6l4m)
In this case, the user needs to log in before the operation can be performed, which means token authorization is required. Please understand first:
["WeChat Mini Program login to obtain openid and third-party tokens"](https://www.yuque.com/apifm/doc/kaygbw)
# Function introduction
1. Meet users’ needs for invoicing and reduce manual intervention in communication;
2. The user directly submits the invoicing application (header, tax number, amount, invoice content, express delivery address, etc.);
3. Financial personnel can view the invoice application in the background and process it in a timely manner;
# Enable the "Invoice Management" module
Log in to the "First Step" registration background, left menu --> Factory settings --> Module management
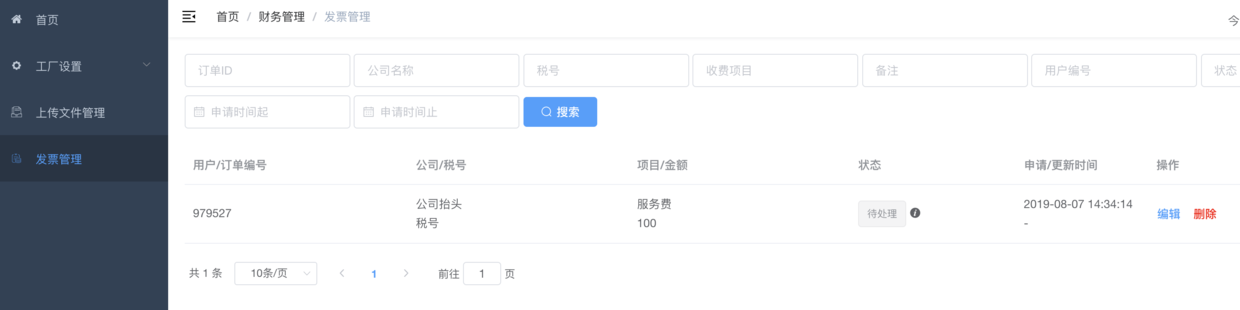
Find the "Invoice Management" module, click "Enable Module", then F5 to refresh the background interface, you will see the new menu: "Invoice Management";
# Mini program interface:
```plain
```
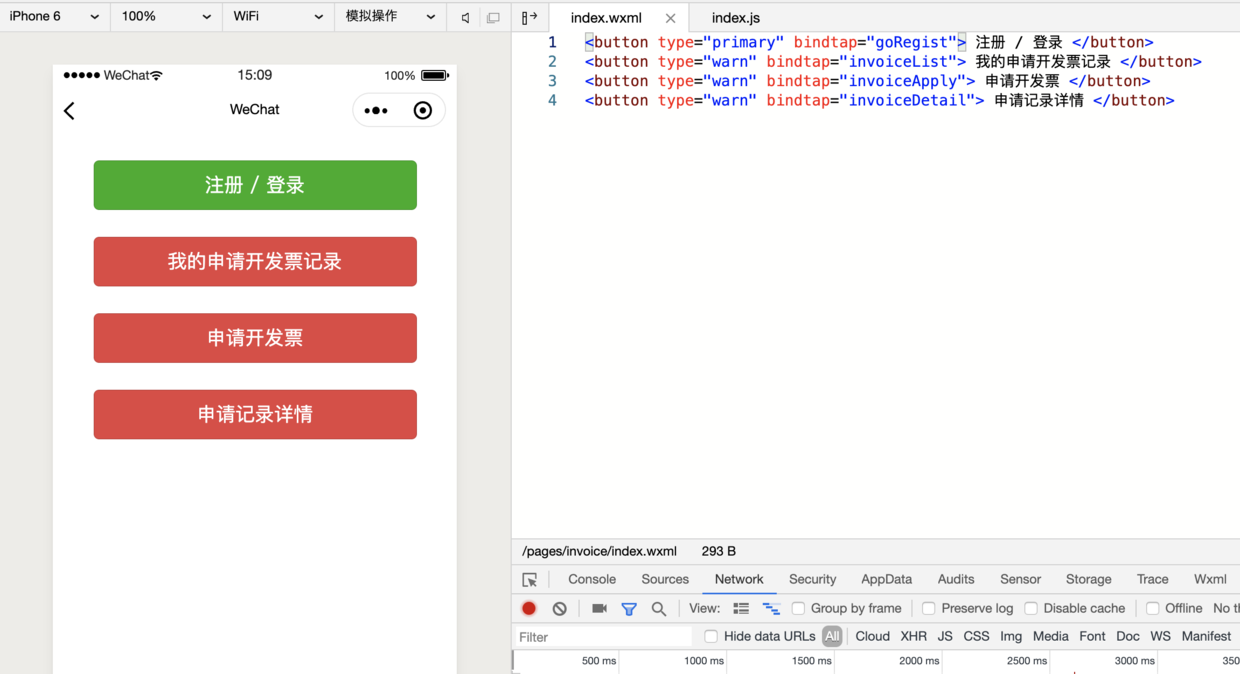
# Mini program code:
```plain
const WXAPI = require('apifm-wxapi')
WXAPI.init('gooking')
Page({
data: {
},
onLoad: function (options) {
},
onShow: function () {
},
goRegist() {
wx.navigateTo({
url: '/pages/auth/index'
})
},
invoiceList() {
const loginToken = wx.getStorageSync('loginToken')
if (!loginToken) {
wx.showToast({
title: 'Please log in first',
icon: 'none'
})
return
}
WXAPI.invoiceList({
token: loginToken.token
}).then(res => {
console.log(res)
if (res.code == 0) {
wx.showToast({
title: 'Read successfully',
icon: 'success'
})
} else {
wx.showToast({
title: res.msg,
icon: 'none'
})
}
})
},
invoiceApply() {
const loginToken = wx.getStorageSync('loginToken')
if (!loginToken) {
wx.showToast({
title: 'Please log in first',
icon: 'none'
})
return
}
WXAPI.invoiceApply({
token: loginToken.token,
comName: 'Company title',
tfn: 'tax number',
amount: 100, // Invoice amount
consumption: 'service charge',
remark: 'test'
}).then(res => {
console.log(res)
if (res.code == 0) {
wx.showToast({
title: 'Application successful',
icon: 'success'
})
} else {
wx.showToast({
title: res.msg,
icon: 'none'
})
}
})
},
invoiceDetail() {
const invoiceId = 22 //Record ID in the record
const loginToken = wx.getStorageSync('loginToken')
if (!loginToken) {
wx.showToast({
title: 'Please log in first',
icon: 'none'
})
return
}
WXAPI.invoiceDetail(loginToken.token, invoiceId).then(res => {
console.log(res)
if (res.code == 0) {
wx.showToast({
title: 'Read successfully',
icon: 'success'
})
} else {
wx.showToast({
title: res.msg,
icon: 'none'
})
}
})
},
})
```
> WXAPI.init('gooking') This code links your mini program to your backend, where gooking is your exclusive domain name (please check the chapter about exclusive domain names in the preface);
>
_Done! _
_To apply for invoice record list paging, more filtering conditions, to submit more parameters when applying for invoices, and to use extended attributes, you can view the following interface documents: _
["api interface document"](#)
_No back-end programming is required, as long as you have a good idea, you can quickly implement it! _
Looking forward to your progress!
grateful!